Aerosim DC-10


review
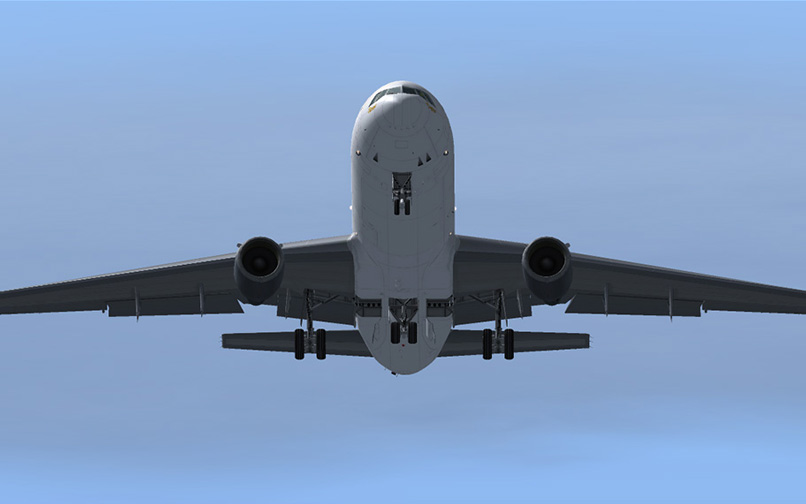
The McDonnell Douglas DC-10 is a classic three-engine, medium to long range, widebody commercial jet airliner. The DC-10 first flew in 1970 and entered commercial service with American Airlines in 1971. Production of the DC-10 ended in 1989, a year before the more modern MD-11 entered in service.
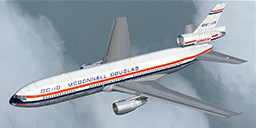
Aerosim is a Japanese developer of various MS Flight Simulator products. Many classic aircraft are available in special packages. The DC-10 is part of the Classic Liners Vol. 2 package. The package contains the DC-10-30 and DC-10-40 with only a few liveries: Mcdonnell Douglas house livery, Hawaiian and Northwest Airlines. Unfortunately, there are not many 3rd party liveries available on websites like AVSIM. Besides the DC-10, the package contains more classic aircraft: Douglas DC-8 and Lockheed L-1011 Tristar.
Like many aircraft developed by Aerosim, the virtual cockpit is quite simple. Not all buttons are clickable, 2d textures are used instead. On the other hand, a simple virtual cockpit is good news for your frame rate. The flight dynamics are ok and the aircraft is quite easy to fly too. All usual animations are present and everything works as it should. The main landing gear however, is not realistic, because it is not flexible. The rear set of wheels make first contact with the runway, then the forward set of wheels should come down too, which is not happening until the nose wheel comes down. Also, the pitch trim seems to be too sensitive, resulting in sudden pitch attitude changes while pressing the trim buttons.
--
the good
the bad
License |
: | Payware |
Price Indication |
: | $35.00 |
Panel |
: | Yes |
Virtual Cockpit |
: | Yes |
Wingview |
: | No |
Sound |
: | Yes |
Developed for |
: | FS2004 |
Compatibility |
: | FS2004 FSX |
Wingflex |
: | No |
Landing gear |
: | Unrealistic, see review |
Rudder effect |
: | Realistic |
FS2004 |
: |
|
FSX |
: |
|
Links
notes
1. First, find the original installer. Unzip the archive to a temporary folder. The folder that contains the file 'install.exe' should also contain a sub-folder called 'CL2'. Go in that folder and you'll see these sub-folders: aircraft, Effects, Flights, fonts and gauges.
2. Move or Copy the contents of the 'aircraft' folder to the SimObjects\Airplanes folder of FSX (e.g. C:\Program Files\Microsoft Games\Microsoft Flight Simulator X\SimObjects\Airplanes\ ).
3. Move or Copy the contents of the 'Effects' folder to the main effects folder of FSX (e.g. C:\Program Files\Microsoft Games\Microsoft Flight Simulator X\Effects\ ).
4. Move or copy the contents of the 'fonts' folder to the main fonts folder of FSX (e.g. C:\Program Files\Microsoft Games\Microsoft Flight Simulator X\Fonts\ ).
5. Move or copy the contents of the "gauges" folder to the main gauges folder of FSX (e.g. C:\Program Files\Microsoft Games\Microsoft Flight Simulator X\Gauges\ ).
NOTE: The instructions above are for the whole package, so you don't have to do this again for the other aircraft in the package. However, the instructions below are valid for the DC-10-30 and DC-10-40 models only.
6. Copy the files "737-400.gau" and "magnetic_compass.gau" from the main gauges folder of FS2004 (e.g. C:\Program Files\Microsoft Games\Flight Simulator 9\Gauges\) to the main gauges folder of FSX (e.g. C:\Program Files\Microsoft Games\Microsoft Flight Simulator X\Gauges\).
7. OPTIONAL: Thumbnail image for the aircraft selection list. Right-click on the images below and choose "Save Picture As..." or "Save Image As...", browse to the folder \Program Files\Microsoft Games\Microsoft Flight Simulator X\SimObjects\Airplanes\AS_DC10_30_CL2\ and choose between the texture folders. The text below the image shows you the right texture folder to save the thumbnail image in. (e.g. \AS_DC10_30_CL2\Texture\ ).
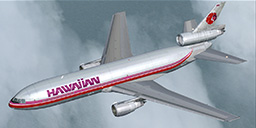
Right-click on the images below and choose "Save Picture As..." or "Save Image As...", browse to the folder \Program Files\Microsoft Games\Microsoft Flight Simulator X\SimObjects\Airplanes\AS_DC10_40_CL2\ and choose between the texture folders. The text below the image shows you the right texture folder to save the thumbnail image in. (e.g. \AS_DC10_40_CL2\Texture\ ).

Next time when you start FSX, the aircraft should be visible in the aircraft selection list and work fine. If you download additional liveries, you can make thumbnail images yourself: you need to make a screenshot of each livery of the aircraft and resize it to 256x128 pixels (use an image editor like photoshop, paintshop or whatever you prefer). Make sure the image format is JPG and name each of them "thumbnail.jpg". Then copy the image to each texture folder inside the aircraft folder.
on 08/05/2008 at 19:46:37
goodon 01/21/2009 at 5:50:31
I hated this plane so much i deleted it from my aircraft and then bought the cls its much betteron 05/04/2009 at 13:11:02
hmm... love it.on 05/05/2009 at 10:55:09
now I'll stay tuned..on 05/17/2009 at 17:56:02
I should email you about this.on 06/07/2009 at 17:24:03
well.. it's like I thought!on 07/26/2009 at 0:00:18
hm. love it )on 09/29/2009 at 13:51:40
eh... love it ))Add a Comment
Comments