How to repaint aircraft for FS2004 and FSX - Part 3
Export the textures for the first time
Now that the aircraft has been installed, lets get back to the paintkit in Photoshop. You need to add the painted parts to the 3 texture files that make up the left side of the fuselage, including the tail. First, click on "Select" in the menu on top and then on "All". Now go to the menu on top again and click on "Edit" and then on "Copy Merged". With these few commands you have selected the entire paintkit and copied it to the clipboard as a flat (= without layers) image. Next thing is to open the first texture file. Go to the top menu and click on "File" and then on "Open". Browse to the paintkit folder and open the "fuselage" folder and then the "White layout" folder. You should see a file called "OS772_LFuse_FRONT_T.BMP". Open the file.
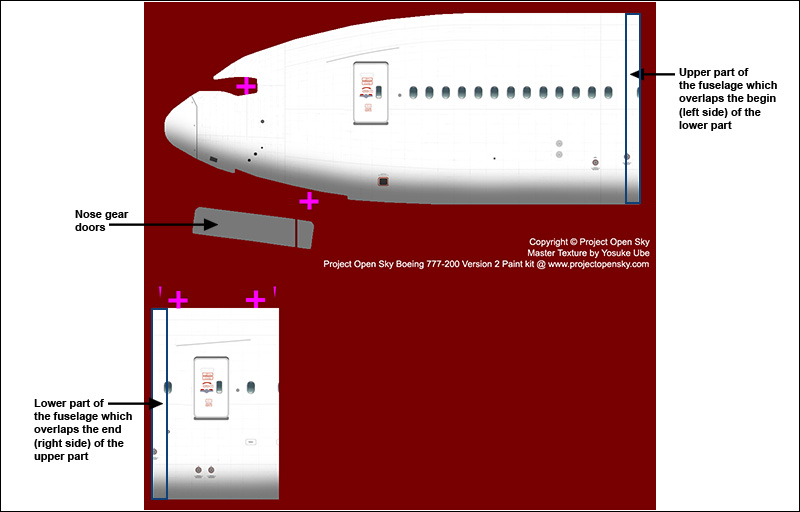
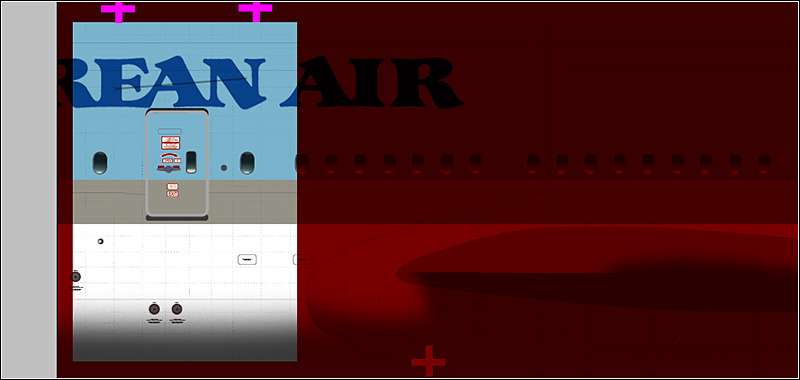
Now you see the forward part of the white fuselage. Go to the menu on top and choose "Edit" and then "Paste". If you have done everything right, the painted fuselage from the paintkit has been added to the image as a new layer. Now go to the layers window and make sure that the new layer is selected (which should be "Layer 1"). Now there is a dropdown menu just above the selected layer that should say "Normal". Click on it and select "Multiply". The layer should become transparant, so you can see the background through it. Left-click in the image and hold the left mouse button while you move the mouse to align the fuselage of the new layer with the white fuselage in the background. For that, you can use the magenta colored crosses, which are meant for alignment. You can use the Zoom Tool to zoom in on the image so you can be more precise. Note that the top part of the fuselage should be aligned, you will take care of the smaller lower part in a moment. To make this easier, you can enable snapping. On the menu on top, click on "View" and then on "Snap".
When you have aligned the layer with the background, go back to the layers window and change the blending mode from Multiply to Normal again. First thing you have to do now is cut out the part of the fuselage on top. The reasons are that you want to keep the copyright text and more important, the lower part of the fuselage, which you will do after this one. Since you need to do this over and over again during the painting process, it is better to save yourself the trouble and save the selections that cut out the right parts. Go to the layers window and make "Layer 1" invisible. To do that, you have to click once on the eye symbol left to the layer, so it disappears. Now select the background layer.
Use the Rectangular Marquee Tool to select a part of the white fuselage
on top.
After that, click on "Select" in the menu on top and then click on "Transform Selection". Click and hold the left mouse button at the square on the left to stretch the selection to the left as shown in the screenshot below.
Press and hold the shift key while you use the Rectangular Marquee Tool to select the nose gear doors.
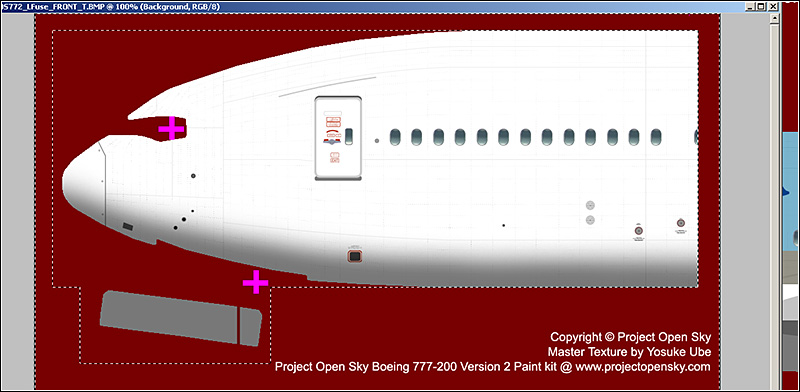
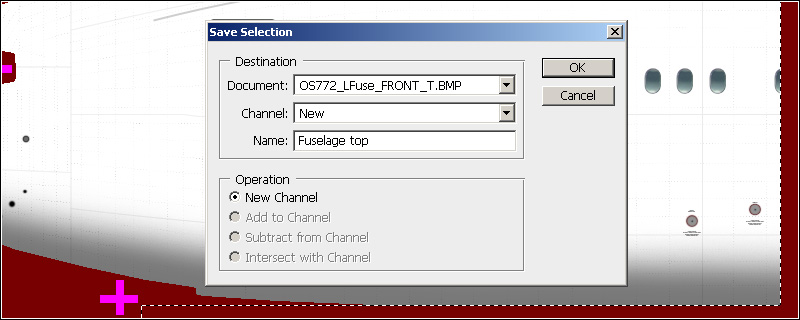
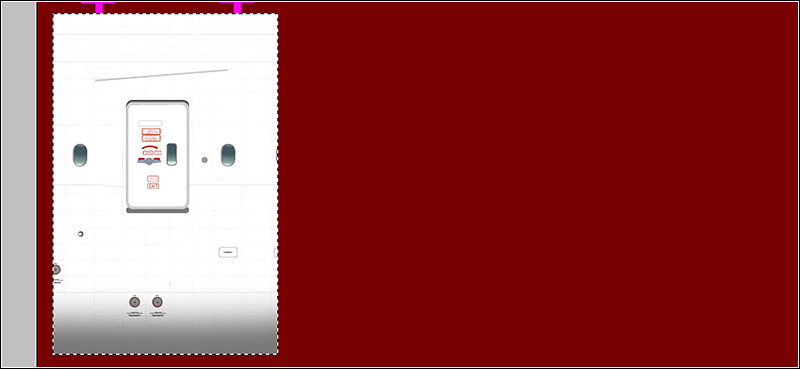
Go to the menu on top and click on "Select" and then on "Inverse", so it looks like the screenshot above. Go to the menu on top again and click on "Select" and then on "Save Selection...". Name it "Fuselage top" and click on "OK". Now this selection has been saved. You can load it via the "Load Selection..." function.
Go back to the layers window and select "Layer 1" and make it visible again (click once in the empty box left from the layer so the eye appears). Check if the selection is still active, if not, you can load it as described earlier. Hit the delete key (on your keyboard) and everything in the selection should be gone, keeping the painted fuselage. Now you can deselect the selection, you can do that via the menu on top > Select > Deselect.

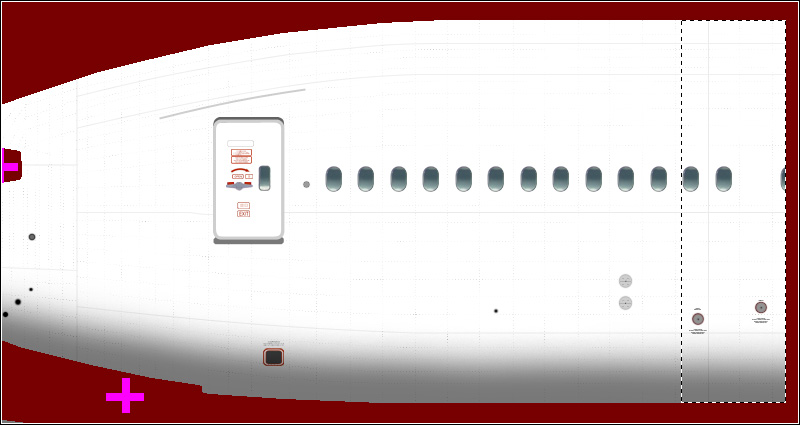
Now you have to do it all again for the lower part of the fuselage. Go to the menu on top and click on "Edit" and then on "Paste". If you haven't copied anything else or restarted Photoshop, then the painted fuselage will be pasted again as a new layer named "Layer 2". If not, you will need to go to the paintkit again, select all and copy it to the clipboard. Now you basically have to do the same things as you did with the top part of the fuselage. Go to the layers window, select "Layer 2" and change the blending mode to "Multiply". Position this part of the fuselage as seen in the screenshot below.
Change the blending mode back to "Normal" and make "Layer 2" invisible. Select the background layer. Use the Rectangular Marquee Tool to select the lower part of the fuselage.
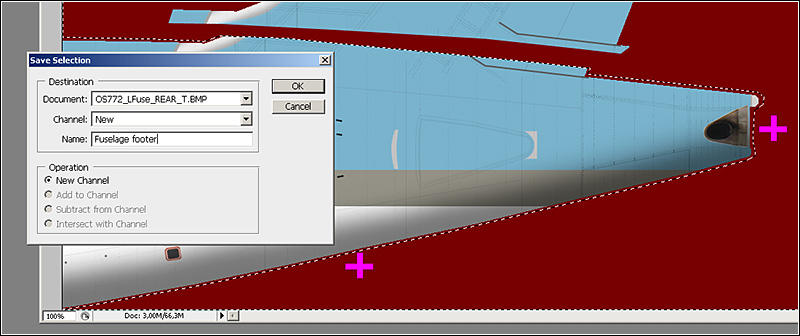
Go to the menu on top and click on "Select" and then on "Inverse". Click on "Select" again and click on "Save Selection...". Name it "Fuselage footer" and click on "OK". Now this selection has been saved as well. Go back to the layer window, select "Layer 2" and make it visible again. Hit the delete key so only the lower part of the fuselage remains. Deselect.
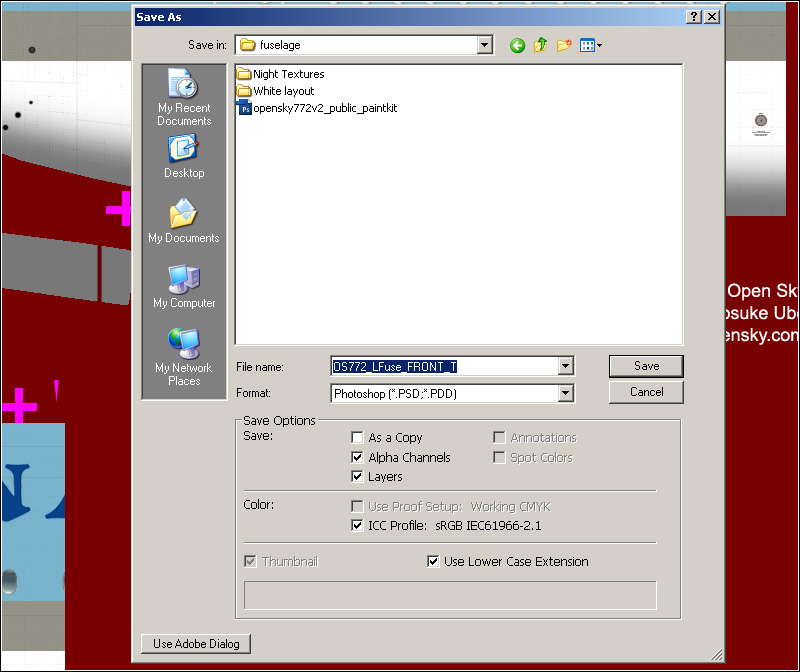
Now keep this window open, you need to save this file, so you can just load the selection next time. Go to the menu on top and click on "File" and then on "Save As...". The save window will appear now. Make sure that you save in Photoshop format (which will keep your saved selections) and save the file in the folder "fuselage". See the screenshot below.
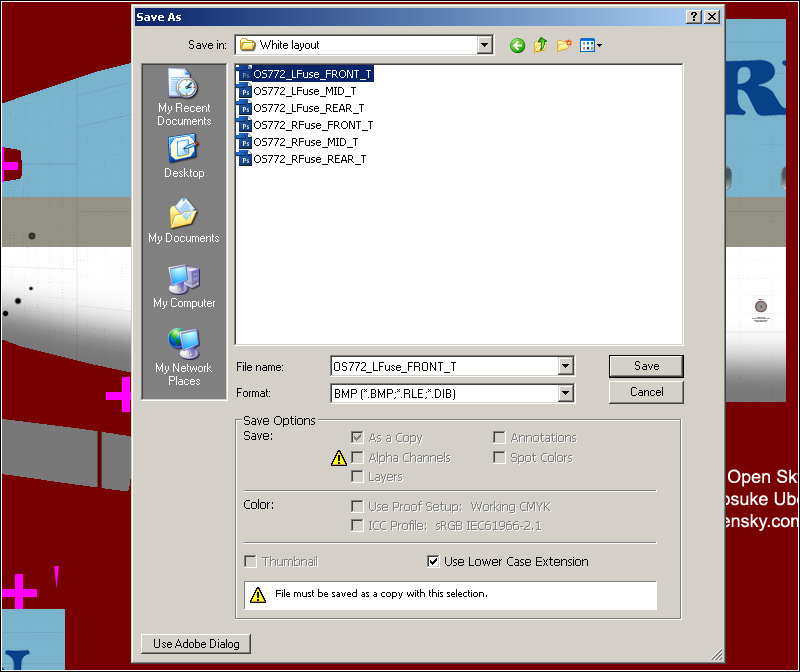
After you have saved the image as a Photoshop file, go to the menu on top and click on "Layer" and then on "Flatten Image". Now all layers are merged together, so you can save the image as bitmap file. Go to the menu on top and click on "File" and then on "Save As...". The save window will appear again. This time, change the format to "BMP". When you have done that, the file name will change to " OS772_LFuse_FRONT_T copy.bmp". Change it back to "OS772_LFuse_FRONT_T.bmp". Save the bitmap to the "White layout" folder. After you have clicked the save button, the BMP Options window will show. Make sure that the file format is "Windows" and the depth at least 24 bit.
So, that was one of the left fuselage textures...two more to go. Up next is the file "OS772_LFuse_MID_T.BMP". Note that I will shorten the instructions a bit now, if there is something not clear, see the detailed instructions for the first file, they are basically the same.
Open the file "OS772_LFuse_MID_T.BMP" (which is in the "White layout" folder) as described before. Go to the paintkit and use select all and copy merged to copy the entire fuselage and tail to the clipboard. Paste it into the "OS772_LFuse_MID_T.BMP" image. Use the multiply trick to align the painted layer on the white fuselage in the background. After that, change the blending mode back to "Normal", make "Layer 1" invisible and then select the background layer.
Use the Rectangular Marquee Tool in combination with the Transform Selection function to select the upper part of the fuselage, including the belly of the aircraft. Inverse the selection, save it and name it "Fuselage top".
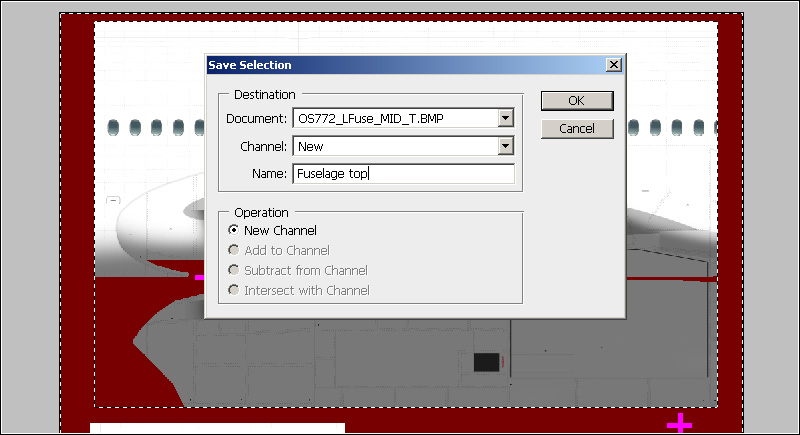
Now select "Layer 1" and make it visible again. Hit the delete key to remove everything but the upper fuselage and belly part.
Now do the same with the lower-left part of the fuselage. Again, paste the painted fuselage so it becomes "Layer 2". Use the multiply trick to align the painted layer on the white fuselage in the background. After that, change the blending mode back to "Normal", make "Layer 2" invisible and then select the background layer.
Use the Rectangular Marquee Tool in combination with the Transform Selection function to select the lower-left part of the fuselage. Inverse the selection, save it and name it "Fuselage lower-left".
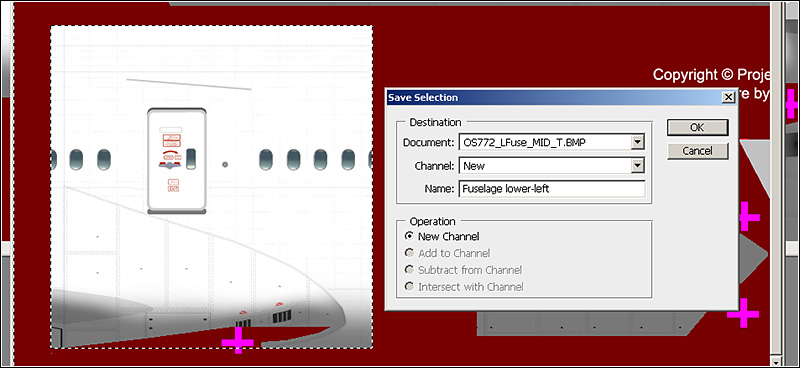
Now select "Layer 2" and make it visible again. Hit the delete key to remove everything but the lower-left fuselage part.
Finally, do this all again for the left belly part.
Again, paste the painted fuselage so it becomes "Layer 3". Use the multiply trick to align the painted layer on the left belly part in the background. After that, change the blending mode back to "Normal", make "Layer 3" invisible and then select the background layer. This time, use the Polygonal Lasso Tool to select the left belly part. The selection should look as shown in the screenshot below.
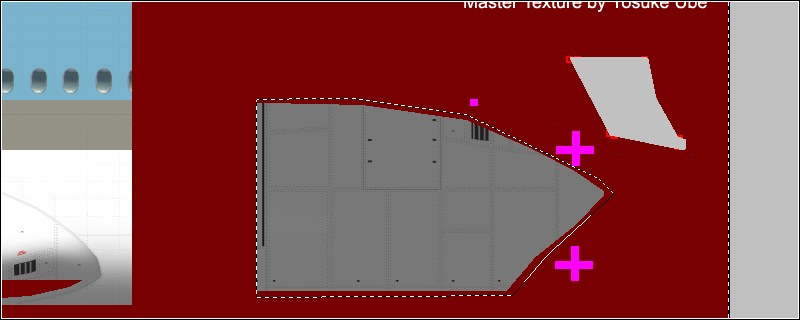
Inverse the selection, save it and name it "Belly left ". Now select "Layer 3" and make it visible again. Hit the delete key to remove everything but the left belly part. Save the image as Photoshop file to the folder "fuselage", just like you did with the first texture file. Flatten the image and save it as BMP file to the folder "White layout".
Now you have to do it all again once more for the file "OS772_LFuse_REAR_T.BMP". It is basically the same like you did with the other 2 files. Just make sure that the selections look like this:
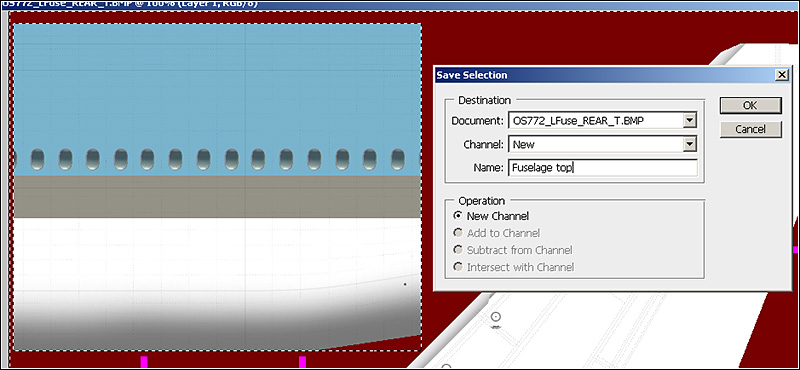
Save the file in Photoshop format and BMP format as described before.
| NEXT PAGE |