How to repaint aircraft for FS2004 and FSX - Part 7
Dirt effects
Unless an aircraft has just been cleaned, there should be dirt on the fuselage. Aircraft get dirty due to bad weather, engine smoke, tire smoke and jetways. Painting dirt on a livery adds realism. So lets start and make some dirt.
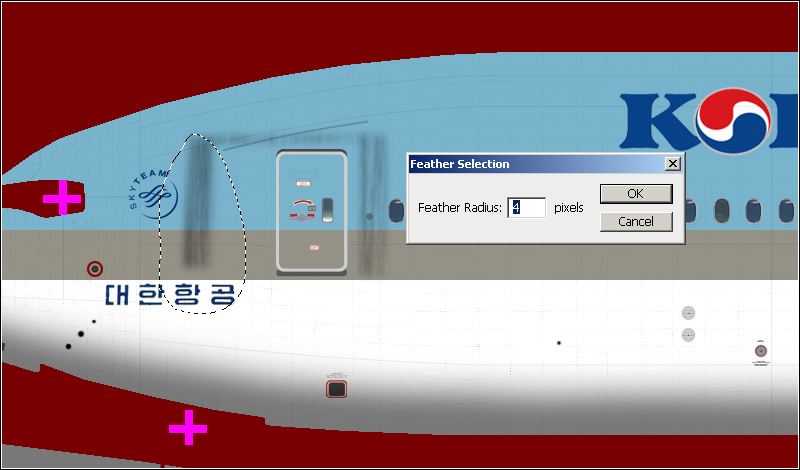
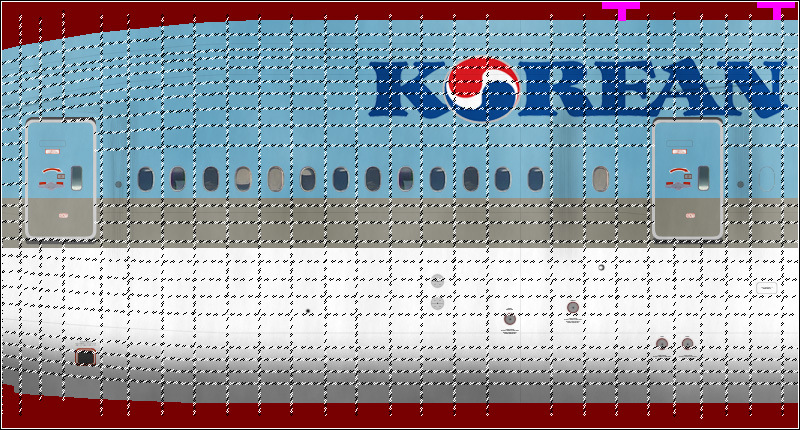
There are many ways to create dirt effects in Photoshop. I will show you a few that can be used for this paint. Start with the dirt around the passenger doors, caused by the jetways. Create a new layer and put it above the layer group "Effect". Use the Polygonal Lasso Tool to select something like this around the door:

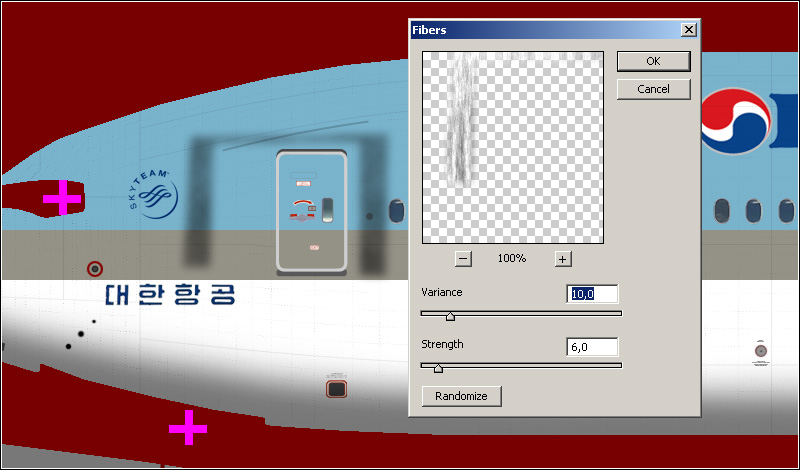
At the menu on top, click on "Select", then on "Modify" and then on "Feather...". Set the radius to 4 pixels and click on "OK". Now click on "Filters", then "Render" and then on "Clouds". Change the blending mode of this layer to "Multiply". Then click on "Filters" again, then "Render" and then on "Fibers". Select a Variance of 10,0 and a strength of
6,0. Click on "OK".
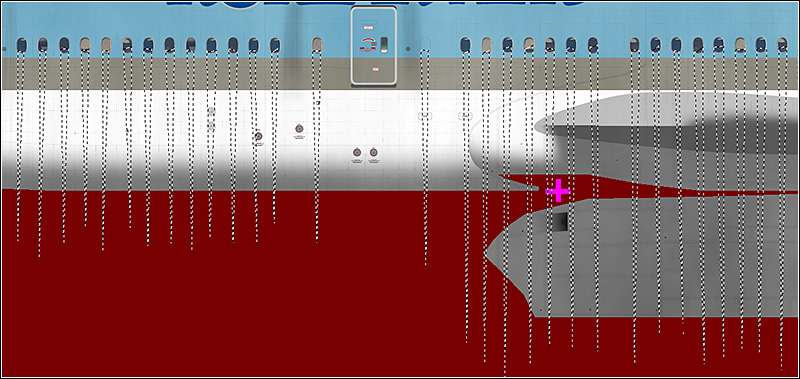
Use the Lasso Tool to select a part like I did here:
Go to the menu on top and click on "Select" then on "Modify" and finally on "Feather...". Make it 4 pixels and click on "OK". Now click on "Filter", then "Blur" and finally on "Motion Blur...". Set the angle to 90 degrees and the distance to 64 pixels. Click on "OK". Do the same for the right part of the dirt, select it, feather it and motion blur it.
Do it for the upper part of the dirt as well, but with a motion blur angle of 0 degrees and distance of 15 pixels.
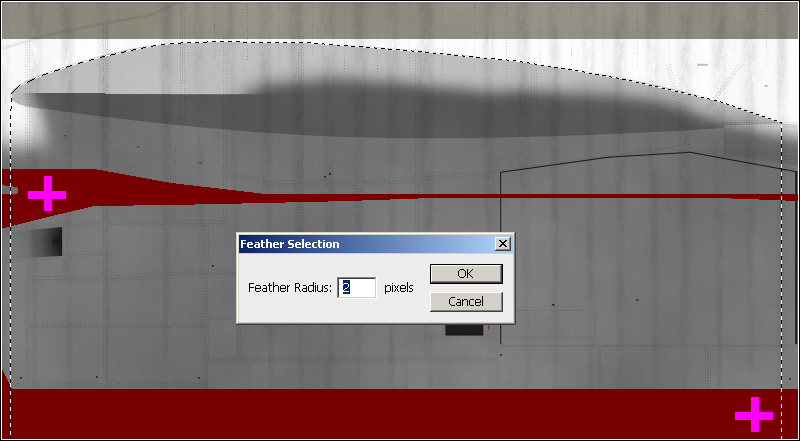
Make a selection just like I did here:

Feather it by 4 pixels and hit the delete key.
Set the opacity of this layer to 50% and name it "Jetway dirt 1".
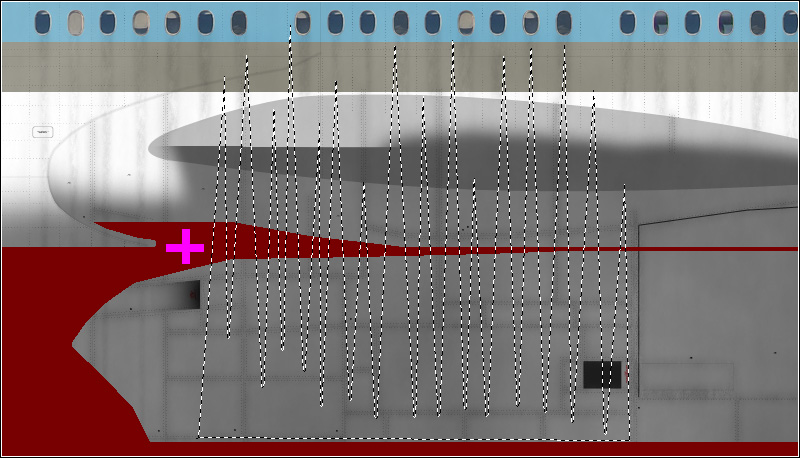
If you like, you can sharpen the layer a bit. To do that, click on "Filter" then on "Sharpen" and finally on "Sharpen More". Do the same again for the second passenger door. After that, the paint should look a bit like this:
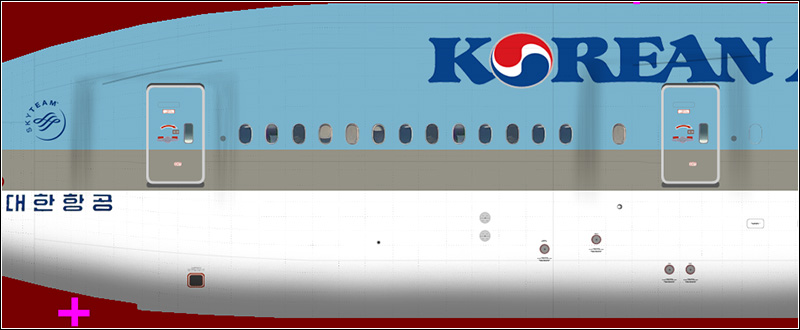
The jetway dirt is only for the left side, leave the doors on the right side clean.
Now let's add some dirt effects to the whole fuselage and tail. First, make the foreground color white and the background black. Select the layer "outline" and use the Magic Wand Tool to make a selection of the outline. To do that, activate the Magic Wand Tool and click once inside the fuselage, so the outline becomes selected. Create a new layer, name it "fusedirt 1" and keep the selection active. Go to the menu on top and click on "Filter" then on "Render" and finally on "Clouds".
Change the blending mode of this layer to "Overlay" and the opacity to 25%. Create another new layer, while you still keep the selection. Name this layer "fusedirt 2" Now create clouds again and after that click again on "Filter" then on "Render", but this time on "Fibers...". Choose a variance of 15,0 and a strength of 1,0. Change the blending mode of this layer to "Multiply" and the opacity to 5%. You can deselect now.
Go to the layer group "left detail" and select the layer "Layer 28". Set the opacity to 80%. Use the Magic Wand Tool to select all the 'dots'.
Inverse the selection. Select layer "fusedirt 1" and hit the delete key. Do the same for layer "fusedirt 2". Deselect. Now you have a bit of dirt on the fuselage. You can adjust the opacity of both dirt layers to increase or decrease the amount of dirt.
Lets make some window dirt. Again, make the foreground color white and the background black. Make selections for all windows like this:
Use the Polygonal Lasso Tool and hold the shift key to keep the previous selection each time. After you made all the selections, feather it by 2 pixels (Select > Modify > Feather...). Render clouds (Filter > Render > Clouds) and then render difference clouds (Filter > Render > Difference Clouds). After that, render Fibers (Filter > Render > Fibers...) and set the variance to 29,0 and the strength to 1,0.
Deselect and change the blending mode to "Multiply". Rename the layer to "Window dirt" and put the layer in the layer group "Windows". Use the Eraser Tool to adjust the dirt around the windows. Set the opacity of the layer around 10%, or anything you like. Finally, use the Polygonal Lasso Tool to select the wing part and feather to selection by 2 pixels. Then, delete the selection.
The tail is next. First, lets make it look a bit older. First you have to duplicate the layer "Tail logo left". Name the duplicate "Tail logo right". Flip the logo horizontal (Edit > Transform > Flip Horizontal). Make the layer invisible.
Select layer "Layer 26" in the layer group "tail". Use the Magic Wand Tool to select the dots and then inverse the selection.
Select the layer "Tail logo left", while you keep the selection. Hit the delete key. Do the same for the layer "Tail logo right".
Now you are going to add some dirt to the belly of the aircraft. Select the layer "Layer 15", which is inside the layer group "left fairing". Use the Magic Wand Tool to select the lines and then inverse the selection. Create a new layer and name it "Belly dirt left". Expand the selection by 2 pixels (Select > Modify > Expand...). Then, feather the selection by 4 pixels (Select > Modify > Feather...).
Render clouds (Filter > Render > Clouds) and then render Fibers (Filter > Render > Fibers...) and set the variance to 20,0 and the strength to 1,0. Sharpen the selection (Filter > Sharpen > Sharpen More). Deselect and change the blending mode to "Multiply". Set the opacity to 15%, or any value you like.
Do the same with the right side. The layer you need for the selection is "Layer 67" for the right side.
Name the dirt layer for the right side "Belly dirt right".
Now, you are going to add some dirt to the air inlet and gear bay doors. Create a new layer in the layer group "left fairing" and name it "air inlet dirt left". Make a selection with the
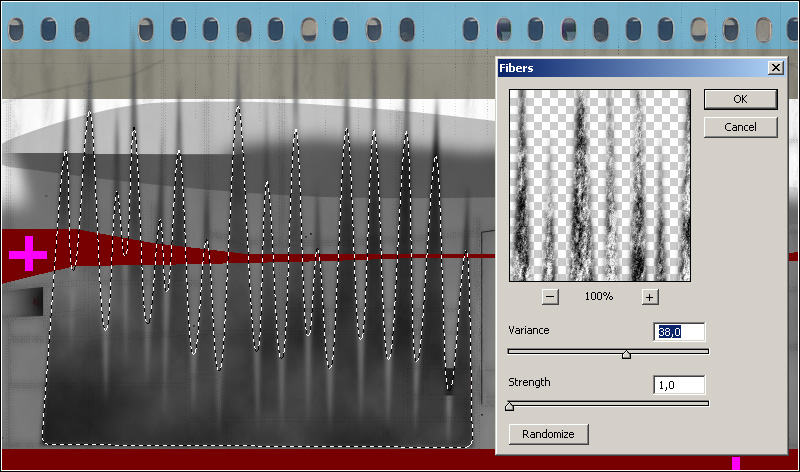
Polygonal Lasso Tool like this:
Feather the selection by 2 pixels. Render clouds. Feather again, 4 pixels this time. Render fibers with a variance of 38,0 and strength of 1,0.
Deselect and click on "Edit", then "Transform", and then on "Rotate 90 degrees CW". Now use the Free Transform function to shrink the dirt layer to this:
Go to the Filters and "Sharpen More" this layer. Then, change the blending mode to "Multiply" and set the opacity to 50%, or anything you like. Use the same method for the right side, or just duplicate this layer for the right side. With this method, you can also add dirt to the gear bay doors. I ended up with this:

Time to make the rear fuselage dirty. Select "Layer 27" in the layer group "left detail". Use the Magic Wand Tool to select the dots and then inverse the selection. Create a new layer and name it "APU dirt left". Expand the selection by 1 pixel. Feather the selection by 1 pixels. Render clouds and then render fibers with a variance of 38,0 and strength of 1,0. Deselect and set the blending mode to "Multiply". Set the opacity to 20 %.

Do the same with the right side, or use a duplicate of this layer.
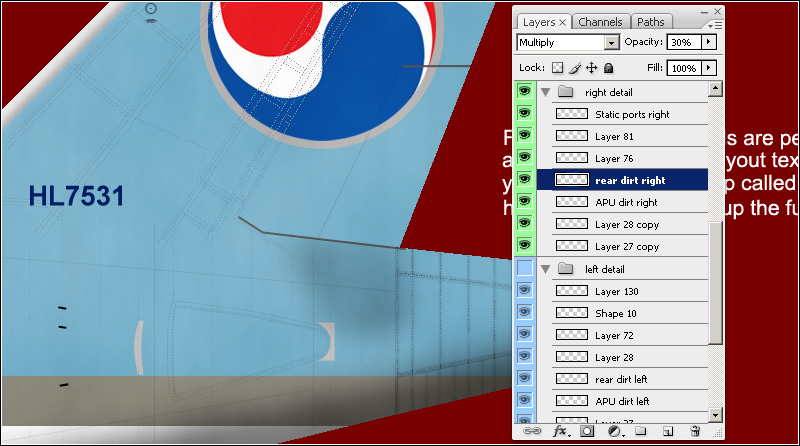
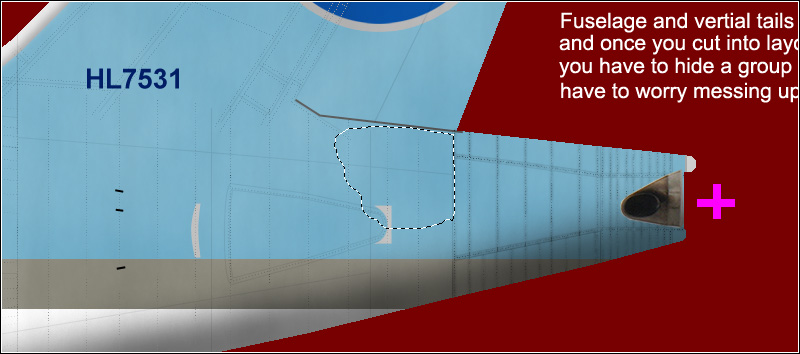
Lets add more dirt. Create a new layer in the layer group "left detail" and name it "rear dirt left". Make a selection with the Lasso Tool like this:
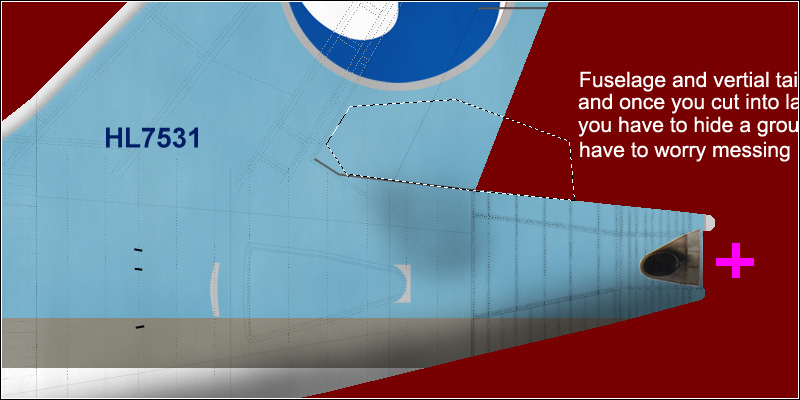
Feather the selection by
12 pixels. Render clouds and Sharpen More 2 times. Deselect and change the blending mode to "Multiply". Set the opacity to 30%. Then, adjust the position of the layer a bit and use the Polygonal Lasso Tool to cut off the part that covers a bit of the rudder.
Do the same for the right side, or use a duplicate of this layer.