How to repaint aircraft for FS2004 and FSX - Part 4
Using Dxtbmp to create fs textures
You
have created three textures:
OS772_LFuse_FRONT_T.BMP, OS772_LFuse_MID_T.BMP and OS772_LFuse_REAR_T.BMP. All of them are saved in the folder "White layout" that is in the paintkit folder. These textures are in bitmap format and are not readable by FS. You need to create extended bitmap textures from them. Use Dxtbmp for that.
Start Dxtbmp
and click on "File" at the menu on top. Then click on "Open", so the open file window will show. Browse to the paintkit folder, then the "fuselage" folder and finally the "White layout" folder. Open the file "OS772_LFuse_FRONT_T". When the texture is loaded into Dxtbmp, make sure that both check boxes at the MipMaps settings are not checked. Go to the menu on top and click on "File" and then on "Save as" and finally on "Extended Bitmap". The save file window will show. Select "Extended 32 bit 888-8" at "Save as type:". At "Save in:", browse to the texture folder of the Korean Air B777-200 folder in FS2004 or FSX (e.g. for FS2004: C:\Program Files\Microsoft Games\Flight Simulator 9\Aircraft\OS772V2_PW4000_KAL\texture.KAL\ or for FSX: C:\Program Files\Microsoft Games\Microsoft Flight Simulator X\SimObjects\Airplanes\OS772V2_PW4000_KAL\texture.KAL\ ). Now you can hit the save button.
Follow the same instructions for the other 2 texture files OS772_LFuse_MID_T.BMP and OS772_LFuse_REAR_T.BMP.
Now you can start FS and load the aircraft. The left side of the aircraft should look like this:
The Korean Air "O" - using layer style and minor adjustments with the eraser tool
As you can see, the Korean Air logo looks right now. However, there is still one detail not right. The "O" with the red/white/blue should have a grey stroke, like the real Korean Air logo. This is ofcourse a minor detail, ignored by the majority of painters. But you are not going to ignore it. It is in fact quite simple to fix.
Go to the paintkit in Photoshop and select the logo layer. Now use the Elliptical Marguee Tool to select just the "O" and nothing else. You can find the Elliptical Marguee Tool behind the Rectangular Marquee Tool button. Just click and hold the left mouse button while you point the mouse pointer to the Elliptical Marguee Tool. Your selection should look like this (zoomed in 300%):
An easy way to resize and position the selection is to hold the spacebar while you hold the left mouse button. When you hold the spacebar, you can move the selection around, release it and you can resize the selection. Do this until the selection looks like the screenshot above.

When done, go to the menu on top and click on "Edit" and then on "Cut".
Use the Eraser Tool to remove the "remains" of the "O".
Click on "Edit" again and then on "Paste". Now you should have the "O" as a new layer. Zoom in on the "O" and use the Eraser Tool to fix the part that was connected to the "K". If done right, the "O" is a smooth oval.
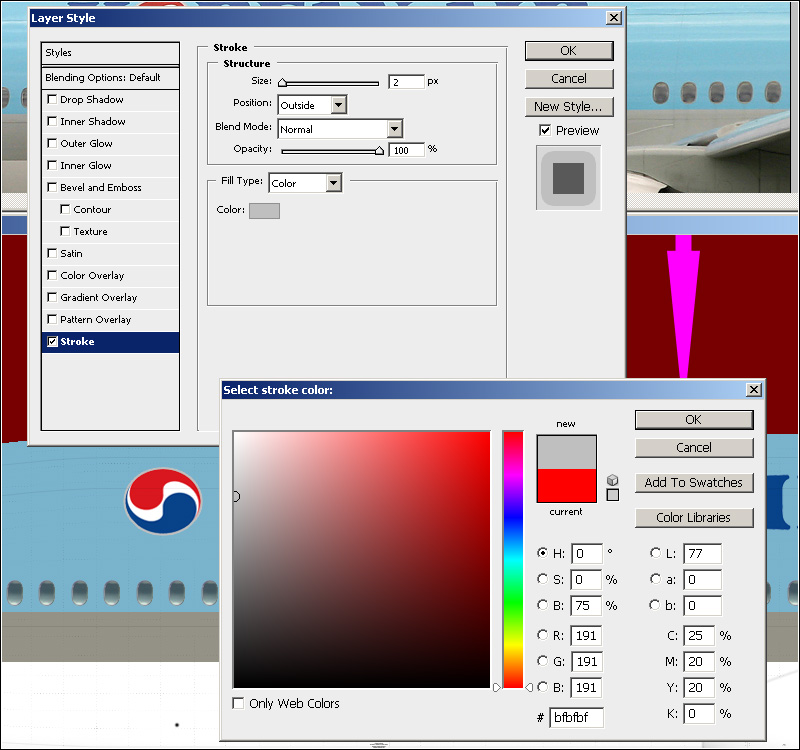
Go to the menu on top and click on "Layer" then on "Layer Style" and finally on "Stroke...". The layer style window will appear. Change the size to 2 px and then click on the box right of "Color:". The "Select stroke color:" window will appear. You now have to select a grey color. Select "#bfbfbf". You can put that color code in the box on the bottom of the "Select stroke color:" window. Click "OK" and "OK" again.
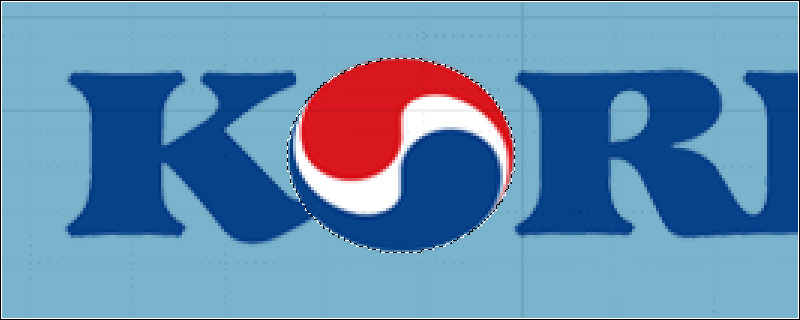
Now reposition the "O" so it looks like this:
Note that you have 2 layers that make up the main logo. I called them "Main logo left" and "O". Select both layers. To do that, click on the first one to select it, then hold shift and click on the second one. If done right, both layers are blue. Go to the menu on top and click on "Layer" and then on "Merge Layers". Both layers are now merged to just one. If the layer name has changed due to the merge, rename it to "Main logo left".
Skyteam logo
Now you are going to add the Skyteam logo, which is located between the cockpit and the first passenger door.
Go to the top menu of Photoshop and click on "File". Then click on "Open..." and open the Korean Air logo you got from Best Brands of the World (the one with the Skyteam logo in it "Korean_Air.eps"). Select 2000x2000 pixels in the rasterize window. After the image has been loaded, use the Rectangular Marquee Tool to select just the Skyteam logo.
Copy the selection to the clipboard ("Edit" > "Copy"). Go to the paintkit and paste the Skyteam logo as a new layer ("Edit" > "Paste"). Name the layer "Skyteam logo left". Change the blending mode to "Multiply".
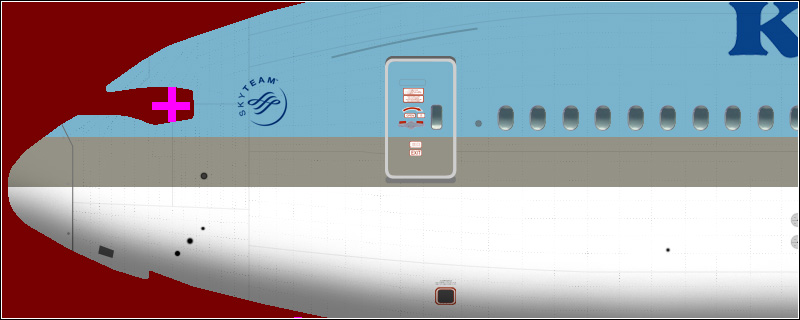
As you can see, just the logo remains, the white background is gone. Now you can resize and position the logo with the Free Transform function ("Edit" > "Free Transform"). Click and hold the left mouse button on one of the squares in the corners. Hold shift to maintain proportions. The result should look like this:
Korean text - using text from a photo
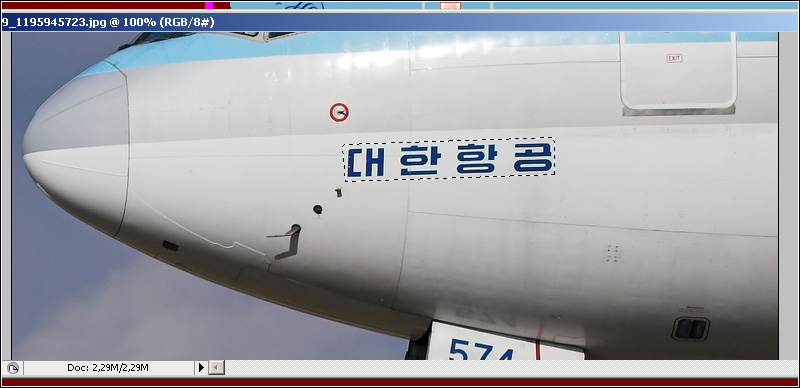
Let's move on and add the Korean text below the Skyteam logo. Search for nose close-up photo and select the text with the Polygonal Lasso Tool, like this:
Copy the selection to the clipboard and paste it into the paintkit. Name the layer "Korean text left". Change the blending mode to "Multiply". Now go to the menu on top and click on "Edit" then on "Transform"
and finally on "Skew". Use the square on the middle-left to align the text horizonally like this:
Zoom in on the text and use the Magic Wand Tool to select the background. Use the delete key to delete the background.
Also select and delete the background that is inside some of the Korean characters. Use the
Magic Wand Tool for this as well.
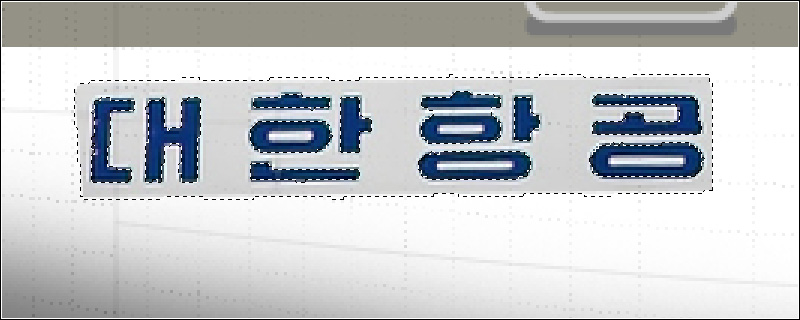
Now all that remains are the Korean characters. Use the Free Transform function to scale and position the text. You can also set the blending mode back to "Normal". The end result should look like this:
This method is very useful for logos or text that isn't available as vector image or font. Only text on a photo from a slight angle can be of any use. Just like I said earlier, the bigger the better. A high resolution text that is scaled down looks a lot better than vice versa.